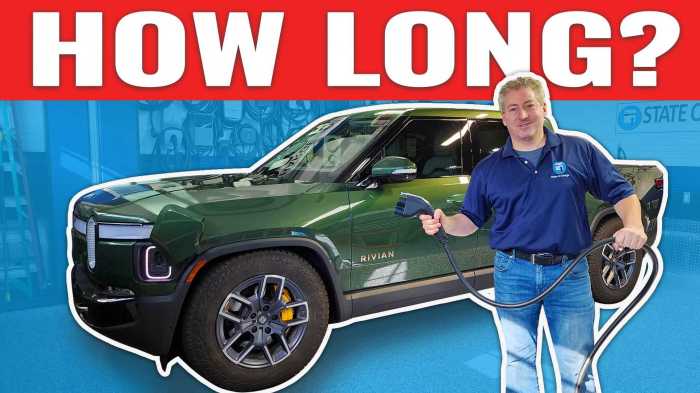
Cost to install a home charger for Rivian R1T? Dude, that’s a totally legit question. Electrifying your R1T at home is awesome, but figuring out the cost can feel like navigating a minefield of electrical jargon and hidden fees. This guide breaks down everything you need to know, from the average price range to those sneaky extras that can inflate your bill.
We’ll cover everything from panel upgrades to finding a reputable installer – so you can charge your ride without breaking the bank.
We’ll dive into the nitty-gritty of different charger types (Level 1, 2, and even DC fast chargers – whoa!), electrical requirements, and how to choose the right charger for your needs and budget. Plus, we’ll show you how to snag those sweet incentives and rebates to keep more cash in your wallet. Get ready to become a home charging pro!
Installation Costs
Getting a home charger installed for your Rivian R1T is a big step towards seamless EV ownership, but the cost can vary quite a bit. Understanding the factors that influence the price will help you budget effectively and avoid any nasty surprises. This section breaks down the average costs and the elements that contribute to the final bill.
Factors Influencing Installation Costs
Several factors significantly impact the total cost of installing a home charger for your Rivian. These range from the simplest, like the type of charger you choose, to more complex considerations such as electrical panel upgrades. Understanding these factors will empower you to make informed decisions during the installation process.
| Factor | Average Cost Range | Potential Variations | Explanation |
|---|---|---|---|
| Charger Type (Level 2) | $500 – $2000 | $500 (basic) to $2000+ (smart features, higher amperage) | The charger itself can range widely depending on features and brand. A basic 240V charger will be cheaper than a smart charger with Wi-Fi connectivity and app control. |
| Electrical Panel Upgrade | $0 – $2000+ | $0 (if no upgrade needed) to $2000+ (significant upgrades) | If your existing electrical panel lacks the capacity for a dedicated 240V circuit, upgrading is necessary and can be expensive. This cost depends on the complexity of the upgrade and local electrician rates. |
| Distance to Electrical Panel | $0 – $500+ | $0 (close proximity) to $500+ (long runs requiring additional wiring) | The further the charger needs to be run from your electrical panel, the more wiring is required, increasing labor and material costs. |
| Permit Fees | $50 – $300 | Varies widely by location and municipality | Permitting requirements and fees vary significantly by location. Always factor in these costs. |
| Labor Costs | $300 – $1000+ | Varies widely based on electrician rates and complexity of installation | Electrician labor costs represent a significant portion of the total installation cost and depend on location, experience, and the duration of the job. |
Comparison of Charger Types
Choosing the right charger type significantly affects the installation cost. Level 1 chargers are the simplest and cheapest, while DC fast chargers are the most expensive and require extensive electrical work. Level 2 chargers represent the sweet spot for most Rivian owners.
So, figuring out the cost to install a home charger for your Rivian R1T can be a bit of a headache, right? You’ve got to think about permits and electrician fees, but it’s totally worth it for convenient charging. It’s a different ballgame than, say, prepping for a DOT inspection checklist for box trucks 2025 , which involves a whole other set of regulations.
Anyway, back to that Rivian charger – make sure you get a few quotes to compare prices before you commit!
| Charger Type | Charging Speed | Installation Cost | Suitable for |
|---|---|---|---|
| Level 1 (120V) | Very slow | Lowest (often included with the vehicle) | Occasional charging, limited range replenishment |
| Level 2 (240V) | Moderate to fast | Moderate (most common for home installation) | Daily charging, convenient and efficient for home use |
| DC Fast Charger | Very fast | Highest (generally not practical for home use) | Public charging stations, very specialized home installations |
Electrical Requirements and Upgrades
So, you’re ready to juice up your Rivian R1T at home. Awesome! But before you plug in, let’s talk about the electricity itself. Your existing home setup might need some upgrades to handle the power demands of a fast home charger. This isn’t just about convenience; it’s about safety and ensuring your charger performs optimally.The Rivian R1T, like other EVs, requires a significant amount of power to charge quickly.
The specific amperage and voltage needed depend on the charger you choose – Level 2 chargers are the most common for home use, and they typically draw between 30 and 50 amps at 240 volts. This is substantially more power than a standard household outlet (120 volts, 15 amps) can provide. Charging at lower amperages is possible, but will significantly increase charging time.
Determining the Need for an Electrical Panel Upgrade
Determining if you need an electrical panel upgrade involves assessing your current electrical service capacity and comparing it to the additional load a Level 2 EV charger will impose. Your electrical panel, often located in your garage or basement, houses circuit breakers that protect individual circuits in your home. Each breaker has a specific amperage rating. A qualified electrician can perform a load calculation, analyzing your current electrical usage and the anticipated draw of the EV charger.
This calculation will determine if your panel has enough available capacity to safely handle the added load. If the calculation shows your panel is near its capacity or overloaded, an upgrade is necessary. For example, a home with a 100-amp service and many appliances already drawing significant power might easily find themselves needing an upgrade. Conversely, a newer home with a 200-amp service might have plenty of headroom.
Types of Electrical Panel Upgrades and Costs
Several types of electrical panel upgrades can accommodate the increased power demand of an EV charger. The most common involves increasing the amperage of your main electrical service. This could involve upgrading from a 100-amp service to a 200-amp service, for example. The cost varies considerably depending on your location, the complexity of the work (e.g., running new service lines from the street), and the electrician’s rates.
Expect to pay several thousand dollars for this type of upgrade. Other upgrades might involve adding additional circuits to your existing panel, a less expensive but potentially limited solution if your panel is already close to full capacity. Finally, a complete panel replacement might be necessary if your existing panel is outdated or damaged. This option is the most expensive but provides the most comprehensive solution for long-term electrical needs.
Challenges and Solutions for Inadequate Electrical Service
Inadequate electrical service can present several challenges. One is simply the inability to install a fast home charger. Using a lower amperage charger extends charging times significantly, negating the convenience of home charging. Another challenge is safety concerns; overloading circuits can lead to overheating, fire hazards, and potential damage to your home’s electrical system. Solutions range from the panel upgrades discussed above to more creative approaches such as installing a dedicated subpanel for the EV charger in a location with adequate service access.
If your home is significantly older, running new service lines from the electric meter to the charger location might be the only viable solution, adding substantially to the project cost. In some situations, even adding solar panels could be considered as a long-term solution to address future energy demands and reduce your carbon footprint.
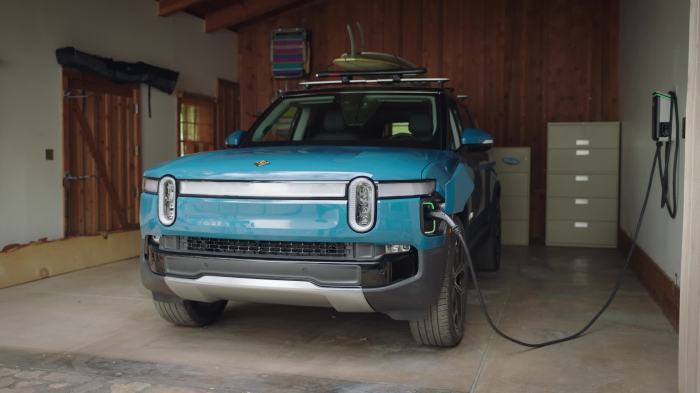
Choosing the Right Home Charger
Picking the right home charger for your Rivian R1T is crucial for maximizing charging convenience and efficiency. The market offers a range of options, each with its own strengths and weaknesses, so understanding the key features and differences is essential before making a purchase. Consider your budget, charging needs, and desired smart features to make an informed decision.
Home Charger Specifications and Features
Several reputable brands offer Level 2 chargers compatible with the Rivian R1T’s onboard charging system. These chargers typically deliver significantly faster charging speeds than a standard Level 1 (120V) charger. Key features to look for include charging speed (measured in kilowatts, kW), smart capabilities (such as scheduling and energy management), and connector type (usually J1772). Many models offer robust mobile apps for remote monitoring and control.
Examples include chargers from Grizzl-E, ChargePoint, and ClipperCreek, each offering various models with differing power outputs and features. For instance, a higher-kW charger will charge your R1T faster, but it will also likely come with a higher price tag and may require a more substantial electrical upgrade to your home’s service panel.
Comparison of Charger Brands and Models, Cost to install a home charger for Rivian R1T
The cost-effectiveness of a home charger depends on several factors, including the initial purchase price, installation costs, and long-term energy consumption. While a higher-kW charger will charge faster, resulting in less overall charging time, the initial investment will be higher. Conversely, a lower-kW charger might be cheaper upfront, but it will take longer to fully charge your vehicle.
Smart features, while convenient, also contribute to the overall cost. For example, the ChargePoint Home Flex offers variable charging speeds (up to 50 amps) and smart features at a mid-range price point, making it a popular choice. A comparison of some models might reveal that a Grizzl-E charger, while potentially more expensive initially, might offer superior build quality and a longer warranty, making it a more cost-effective choice in the long run.
Key Factors in Home Charger Selection
Choosing the right home charger involves careful consideration of several factors.
- Charging Speed (kW): Higher kW ratings translate to faster charging times, but may require electrical upgrades. Consider your typical daily driving habits and charging needs to determine the appropriate kW level.
- Smart Features: Features like scheduling, energy management, and remote monitoring via a mobile app add convenience and can help optimize charging costs. However, these features often come at a premium.
- Warranty: A comprehensive warranty provides peace of mind and protects your investment. Look for chargers with warranties covering both parts and labor.
- Connector Type: Ensure the charger is compatible with the J1772 connector used by the Rivian R1T.
- Installation Requirements: Consider the electrical requirements of the charger and whether you’ll need to upgrade your home’s electrical service panel. This can significantly impact the overall cost.
Installation Process and Timeline: Cost To Install A Home Charger For Rivian R1T
Getting a home charger installed for your Rivian R1T is a pretty straightforward process, but the timeline can vary depending on several factors. This section will break down the typical steps involved, offer a realistic timeline, and discuss potential hiccups and how to avoid them. Think of it as your pre-installation survival guide.
The installation itself generally involves a few key stages: initial assessment, electrical work (if needed), charger installation, and final testing. The complexity and time required for each stage depend heavily on your home’s existing electrical setup. A simple installation might only take a few hours, while more complex projects could stretch into a day or more.
So, figuring out the cost to install a home charger for your Rivian R1T is a big deal, right? It depends on your setup, but it’s totally worth it for convenience. Then again, if you’re hauling serious stuff, maybe you should’ve gotten a truck; check out this comparison of towing capacity for the 2025 models if you’re curious: Toyota Tacoma vs Nissan Frontier towing capacity 2025.
Ultimately, though, the home charger cost for your Rivian will depend on local electrician rates and the complexity of your electrical panel.
Typical Installation Steps
The following steps Artikel a typical installation process. Remember, your specific process might vary slightly.
| Step | Description | Timeline (Estimated) | Potential Delays |
|---|---|---|---|
| 1. Initial Assessment | A qualified electrician assesses your home’s electrical panel, identifies the best location for the charger, and determines if any upgrades are needed. | 1-2 hours | Scheduling conflicts with the electrician. |
| 2. Electrical Upgrades (if needed) | This might involve upgrading your electrical panel, running new wiring, or increasing the amperage capacity of your existing circuit. This is the most time-consuming part. | 4-8 hours (or more, depending on complexity) | Permitting delays, material shortages, unexpected electrical issues. |
| 3. Charger Installation | The electrician mounts the charger, connects it to the wiring, and performs a safety check. | 1-2 hours | Unexpected wiring complications. |
| 4. Final Testing and Inspection | The electrician ensures the charger is functioning correctly and meets all safety standards. | 30 minutes – 1 hour | Minor issues requiring adjustments. |
Realistic Timeline for Installation
A simple installation, requiring no electrical upgrades, could be completed within a single day. However, more complex installations, particularly those requiring panel upgrades or significant wiring changes, could easily take several days or even a week, depending on the electrician’s availability and any unforeseen complications.
For example, a friend of mine needed a panel upgrade and it took a week from initial contact to completion due to a backlog at the permitting office. Another friend had a straightforward installation completed in a single afternoon.
Potential Delays and Mitigation Strategies
Several factors can cause delays. Being proactive can help minimize disruption.
- Permitting Delays: Some areas require permits for electrical work. Apply for permits early to avoid delays.
- Material Shortages: Certain electrical components might be in short supply. Discuss potential lead times with your electrician upfront.
- Unexpected Electrical Issues: Old wiring or unforeseen problems can arise during the assessment or upgrade process. Choose a reputable electrician who can handle unexpected situations efficiently.
- Electrician Availability: Popular electricians may have a backlog of work. Book your appointment well in advance.
Finding Qualified Installers
Finding a reliable electrician for your Rivian R1T home charger installation is crucial. A poorly installed charger can lead to safety hazards, inefficient charging, and costly repairs down the line. Taking the time to find the right installer will pay off in the long run.Getting multiple quotes is essential for comparing pricing and services. This allows you to assess the value proposition of each installer and choose the one that best fits your budget and needs.
Don’t just focus on the cheapest option; consider the overall package, including experience, warranty, and customer service.
Installer Qualifications and Experience
Before you even think about price, vet the installer’s credentials. Confirm they’re licensed and insured – this protects you in case of accidents or damages during the installation process. Look for electricians with specific experience installing EV chargers; it’s not just about basic electrical work, there are specific safety codes and requirements. Check online reviews and testimonials from past clients to gauge their reputation and professionalism.
Experience with Level 2 chargers, the type most commonly used for home installations, is a must.
Questions to Ask Potential Installers
Asking the right questions can help you determine if an installer is right for you. This isn’t about grilling them; it’s about ensuring they understand the specifics of your needs and have the skills to deliver a safe and effective installation.
Examples of Questions to Ask Potential Installers
Potential installers should be able to clearly articulate their approach to the installation. For instance, ask about their process for determining the appropriate amperage and circuit breaker size for your charger. Inquire about their familiarity with local electrical codes and permitting processes. Ask them about their warranty policy and what it covers, including the length of the warranty and the process for filing a claim.
Finally, ask for references – you want to speak to past clients to get firsthand accounts of their experience. These questions will help you assess their competence and professionalism. A reputable installer will welcome these questions and provide detailed, reassuring answers. A vague or dismissive response should raise a red flag.
Incentives and Rebates
Installing a home charger for your Rivian R1T doesn’t have to break the bank. Numerous federal, state, and local programs offer incentives and rebates to help offset the costs. These programs vary widely in their offerings and eligibility requirements, so it’s crucial to research what’s available in your specific area. Taking advantage of these programs can significantly reduce your upfront investment.Federal, state, and local governments are increasingly incentivizing the adoption of electric vehicles to promote cleaner energy and reduce carbon emissions.
These incentives often come in the form of tax credits, direct rebates, or discounts on installation costs. The application processes generally involve submitting an application form, along with supporting documentation like proof of purchase and installation receipts. The amount of the incentive, and the complexity of the application process, will vary depending on the program.
Federal Tax Credits
The federal government offers a significant tax credit for the purchase and installation of qualified home EV chargers. This credit can substantially reduce your tax liability. To qualify, the charger must meet certain requirements, such as being new, installed at a residence, and used to charge a qualified plug-in electric vehicle. The credit amount is a percentage of the cost, up to a certain limit, and it’s claimed when filing your federal income tax return.
The exact amount and eligibility requirements are subject to change, so it’s vital to check the IRS website for the most up-to-date information. For example, in 2023, the credit may have been up to $1,000.
State and Local Incentives
Many states and localities offer additional incentives beyond the federal tax credit. These can include direct rebates, tax exemptions, or even subsidized installation programs. For example, California’s Clean Vehicle Rebate Project offers rebates on the purchase and installation of home EV chargers. Some utility companies also provide rebates or discounted rates for EV charger installations, aiming to manage peak electricity demand.
These programs often have specific requirements, such as income limits or residency restrictions. Checking your state’s energy commission website and your local utility company’s website is crucial to identify available programs.
Incentive Program Examples and Eligibility Requirements
It’s essential to check directly with your local utility and state government websites for the most current information as these programs and their details frequently change. Here is a sample table illustrating thepotential* type of information you might find. Remember to verify all information independently.
| Program | Incentive Type | Amount | Eligibility Criteria |
|---|---|---|---|
| Federal Tax Credit | Tax Credit | Up to $1000 (check IRS website for current details) | New charger, installed at residence, used for a qualified EV |
| California Clean Vehicle Rebate Project | Direct Rebate | Varies (check website for current details) | Residency requirements, income limits (may apply), type of vehicle charged |
| [State Name] Utility Company Rebate | Direct Rebate or Discount | Varies (check utility website for details) | Utility service customer, specific charger models (may apply) |
| [Local Municipality] Program | Direct Rebate or Tax Credit | Varies (check local government website for details) | Residency within municipality, income limits (may apply) |
Long-Term Costs and Maintenance
So, you’ve shelled out for the installation of your home EV charger – congrats! But the initial investment isn’t the whole story. Like any appliance, your home charger will have ongoing costs, albeit usually pretty minimal. Let’s break down what you can expect over the long haul to keep your charging smooth and efficient.
The good news is that home EV chargers are generally quite reliable and low-maintenance. Unlike gas-powered vehicles, there are no regular fluid changes or combustion-related components to worry about. However, there are still some potential expenses and considerations to keep in mind for long-term ownership.
Potential Maintenance Needs and Costs
Regular inspection is key to ensuring a long lifespan for your home charger. Visual checks for loose wiring, damage to the charging cable, and any signs of overheating should be performed periodically. Most issues are easily preventable with simple care. If problems do arise, repairs are usually straightforward, but professional intervention might be necessary for more complex issues.
The cost of such repairs can vary greatly depending on the nature of the problem and the labor rates in your area, ranging from a simple diagnostic fee to potentially hundreds of dollars for component replacement. For example, replacing a damaged charging cable might cost between $100 and $300, while a more serious internal component failure could cost significantly more.
Maximizing Charger Lifespan and Efficiency
Several simple steps can significantly extend the life and efficiency of your home EV charger. Protecting the charger from the elements is crucial; avoid exposing it to direct sunlight, rain, or snow. Keep the area around the charger clear of debris to prevent overheating. Using the correct voltage and amperage for your charger, as specified by the manufacturer, is essential to prevent damage.
Regularly inspect the charging cable for any signs of wear and tear, and replace it if needed. Finally, consider using a surge protector to safeguard your charger from power surges that can cause damage.
Total Cost of Ownership (Five-Year Projection)
Let’s illustrate a potential five-year cost projection. Assume an initial installation cost of $1,500 (this can vary widely). We’ll also assume a conservative annual maintenance cost of $50, encompassing regular inspections and minor troubleshooting. This includes potential costs for minor repairs like replacing a damaged cable. This doesn’t factor in major repairs, which are hopefully infrequent.
Total Cost of Ownership (5 years) = Installation Cost + (Annual Maintenance Cost x 5 years)
Total Cost of Ownership (5 years) = $1500 + ($50 x 5) = $1750
This is a simplified example. Actual costs can vary depending on your location, the type of charger installed, and the frequency of any necessary repairs. However, it provides a reasonable estimate of the potential long-term expenses associated with owning a home EV charger. Remember that this cost is spread over five years and should be considered in the context of the overall savings from charging your vehicle at home compared to public charging stations.
Last Word
So, there you have it – the lowdown on installing a home charger for your Rivian R1T. While the initial cost might seem daunting, remember that the long-term savings on gas and the convenience of home charging far outweigh the investment. Do your research, get multiple quotes, and choose an installer you trust. With a little planning, you’ll be cruising on electric power in no time.
Happy charging!