DIY car detailing kits on a budget are the ultimate game-changer for car enthusiasts looking to achieve that showroom shine without breaking the bank. Forget pricey professional detailing; with a little elbow grease and the right kit, you can achieve amazing results. This guide dives deep into finding the perfect budget-friendly kit, mastering the detailing process, and avoiding common pitfalls, all while keeping your wallet happy.
We’ll cover everything from comparing different kits and their price points to selecting the best products for your car’s specific needs. Learn how to wash, wax, and protect your car’s interior and exterior like a pro, all using affordable and readily available products. Get ready to transform your car’s appearance and save some serious cash!
Introduction to Budget-Friendly DIY Car Detailing
So, your ride’s looking a little rough around the edges, huh? Taking it to a professional detailer can cost a small fortune, but who says you need to break the bank to get that showroom shine? DIY car detailing is totally doable, even on a budget, and it’s way more satisfying than you might think. You get a sense of accomplishment, plus you learn some valuable skills along the way.The appeal of DIY car detailing is multifaceted.
It’s significantly cheaper than professional detailing, offering substantial cost savings. You’re in control of the entire process, ensuring you use products you’re comfortable with and that meet your specific needs. Plus, it’s a great way to spend a weekend, and you end up with a car that looks amazing. Professional detailing can easily run you hundreds of dollars, depending on the service, whereas a good DIY kit can get you comparable results for a fraction of the cost.
Think of the savings you can put toward other things!
Essential Tools and Materials in Budget Kits
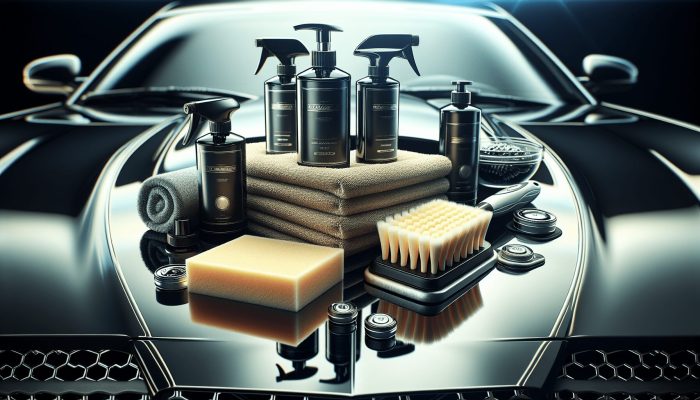
Budget-friendly DIY car detailing kits typically include the basics necessary for a thorough cleaning and a decent level of shine. These kits usually avoid the high-end, specialized products found in professional-grade kits, focusing instead on cost-effective, yet effective, options. A typical kit might contain a wash mitt or sponge, a detailing brush for hard-to-reach areas, various microfiber towels (essential for streak-free drying), a wheel cleaner, a car wash soap (often a concentrate to stretch your money), a quick detailer spray for light cleaning and dusting, and potentially a basic wax or sealant for protection.
Some kits may also include a detailing clay bar to remove embedded contaminants from the paint’s surface, significantly improving the overall shine. The exact contents, of course, will vary depending on the brand and price point. But even the most basic kits provide a solid foundation for achieving a noticeable improvement in your car’s appearance.
Identifying Affordable DIY Car Detailing Kits

So, you’re ready to tackle that DIY car detailing project, but you’re on a budget? No problem! Plenty of affordable kits can get your car looking showroom-ready without breaking the bank. This section will help you navigate the world of budget-friendly car detailing kits, comparing different brands and helping you choose the right one for your needs.Finding the perfect budget-friendly car detailing kit involves careful consideration of several factors.
The ideal kit will contain the right tools and products for your level of detailing expertise and the condition of your car. Don’t get swayed by flashy packaging or overly-promising descriptions; focus on practical, high-quality products that offer good value for money.
Comparison of Budget-Friendly Car Detailing Kits
Choosing a kit depends on your needs and budget. Some kits offer a basic selection of products, while others include a more comprehensive range. Here’s a table comparing a few examples, keeping in mind that prices can fluctuate:
| Brand | Price Range | Included Items | Customer Review Summary |
|---|---|---|---|
| Chemical Guys (starter kit) | $25 – $40 | Wash mitt, wash soap, drying towel, quick detailer | Generally positive; users praise ease of use and effectiveness for basic cleaning. Some mention needing to purchase additional products for more thorough detailing. |
| Meguiar’s (basic kit) | $30 – $50 | Wash mitt, wash soap, wax, applicator pads, microfiber towels | Mostly positive reviews; users appreciate the inclusion of wax for added protection. Some find the wax application a bit challenging for beginners. |
| Adam’s Polishes (entry-level kit) | $40 – $60 | Wash soap, wheel cleaner, tire shine, detail spray, microfiber towels, applicator pads | Strong positive feedback; users value the higher-quality products and comprehensive nature of the kit. A slightly higher price point reflects the superior components. |
| Generic Brand (online retailer) | $15 – $25 | Wash mitt, wash soap, drying towel | Mixed reviews; some find it adequate for occasional cleaning, while others note the lower quality of materials. Often lacks additional products for a complete detail. |
Key Features to Consider When Selecting a Budget-Friendly Kit
Before buying, consider these essential aspects:The quality of included microfiber towels is crucial. Cheap towels can scratch your paint, negating the purpose of detailing. Look for soft, plush microfiber towels specifically designed for car detailing. Also, check for the included products’ composition. Ensure they are appropriate for your car’s paint type and finish.
Some soaps and waxes might not be suitable for all paint types. Finally, consider the kit’s completeness. Does it have everything you need for a basic wash and wax, or will you need to buy additional products separately? A more complete kit, even if slightly more expensive, might save you money in the long run by avoiding individual product purchases.
Essential Steps in a Budget DIY Detailing Process
Getting your car sparkling clean doesn’t require a fortune. With a little elbow grease and some smart shopping, you can achieve professional-looking results on a budget. This section details the essential steps for a DIY car detailing process, focusing on cost-effective methods and products. We’ll cover washing, drying, and waxing your car, all while keeping your wallet happy.This guide breaks down the process into manageable steps, perfect for a weekend project or a series of shorter sessions.
So, you’re trying to keep your ride looking fresh with DIY car detailing kits on a budget? That’s awesome! But, while you’re sprucing up the exterior, don’t forget about protecting yourself – check out this list of Top-rated dash cams with 4K night vision 2025 for ultimate peace of mind. Then, get back to that sweet detailing job and show off your sparkling clean car!
Remember, preparation is key to a successful and efficient detailing job. Having all your supplies gathered beforehand will save you time and frustration.
Washing and Drying the Car, DIY car detailing kits on a budget
Washing your car properly is the foundation of any detailing job. Start by rinsing the entire car with a hose to remove loose dirt and debris. This prevents scratching during the washing process. Next, use a wash mitt or sponge and a bucket of soapy water. A good budget-friendly option is a car wash soap specifically designed for gentle cleaning.
Avoid using dish soap, as it can strip away protective waxes and leave your paint dull. Work in sections, rinsing your mitt or sponge frequently in a separate rinse bucket to avoid recontaminating the wash water. This two-bucket method significantly reduces scratching. After washing, thoroughly rinse the car again with a hose, ensuring all soap residue is removed.
Finally, dry the car using a microfiber drying towel. This will prevent water spots and ensure a streak-free finish. Remember to be gentle to avoid scratching the paint.
Applying a Budget-Friendly Wax or Sealant
Once your car is completely dry, it’s time to add a layer of protection. A good quality wax or sealant will help protect your car’s paint from the elements, UV rays, and minor scratches. There are many affordable options available, such as paste waxes or spray sealants. Before applying, ensure the car’s surface is completely clean and dry.
Follow the product instructions carefully, applying the wax or sealant in thin, even coats using a clean applicator pad. Allow the product to haze before buffing it off with a clean microfiber towel. This step enhances the shine and protects the paint. While a professional-grade wax might offer longer-lasting protection, budget-friendly options still provide significant benefits and are perfectly adequate for maintaining a nice shine between professional detailings.
Maintaining a Clean Car Between Detailing Sessions
Maintaining your car’s cleanliness between full detailing sessions is crucial to preventing dirt and grime buildup. This simple checklist will help you keep your car looking its best:
A consistent cleaning routine is essential for maintaining your car’s appearance and preventing long-term damage. Regularly following these steps will minimize the effort required during your next full detailing session.
- Quick Rinse: Rinse off any visible dirt or mud after driving in harsh conditions.
- Regular Wiping: Use a quick detailer spray and a microfiber towel to wipe down the exterior after each drive.
- Interior Vacuuming: Vacuum the interior regularly to remove dust, crumbs, and debris.
- Glass Cleaning: Clean your windows and mirrors regularly with a dedicated glass cleaner.
- Tire Cleaning: Use a tire cleaner and brush to keep your tires looking fresh.
Choosing the Right Products for Specific Needs
So, you’ve got your budget-friendly DIY car detailing kit. Awesome! But grabbing just any cleaning solution won’t cut it. Choosing the right products for each part of your car is key to getting a great shine without breaking the bank. Different surfaces need different treatments to avoid damage and achieve optimal results. Think of it like this: you wouldn’t use the same soap on your face as you would on your greasy dishes, right?
The same logic applies to your car.Selecting the appropriate cleaning agents depends heavily on the surface you’re working with. Your car’s paint, wheels, interior, and glass all require specific care to avoid scratching, dulling, or damaging delicate materials. Using the wrong product can lead to more work (and more expense) down the road. Let’s look at some cost-effective choices.
Cleaning Solutions for Different Car Surfaces
The most important thing to remember is that gentle is better. Harsh chemicals can strip away wax, damage paint, and even fade your interior. For your car’s paint, a good quality car wash soap is essential. Avoid dish soap, as it can strip away protective waxes. For the wheels, a dedicated wheel cleaner is preferable to prevent brake dust from staining and damaging the finish.
A simple all-purpose cleaner, diluted appropriately, works well for most interior surfaces, but always test it on a hidden area first. For glass, a simple glass cleaner will do the trick. Many auto parts stores offer concentrated versions, which are far more economical in the long run.
Comparing Budget-Friendly Detailing Products
Many inexpensive detailing products perform surprisingly well. Generic car wash soaps often provide comparable cleaning power to more expensive name brands. Look for soaps that are pH neutral to minimize the risk of damage to your paint. Similarly, budget-friendly microfiber cloths are just as effective at cleaning and drying as their pricier counterparts. The key is to look at the product’s specifications and reviews before purchasing.
Sometimes, a little extra research can save you a lot of money.
Cost-Effective Alternatives to Expensive Detailing Products
Believe it or not, your pantry might hold some surprisingly effective detailing solutions. For example, a mixture of white vinegar and water can be a surprisingly effective glass cleaner (just be sure to test it on a small, inconspicuous area first). Baking soda can gently scrub away stubborn stains from your interior. Remember to always dilute any household cleaner before using it on your car, and never mix cleaning products.
Using these alternatives can significantly reduce the overall cost of your detailing project.
So, you’re all about that DIY car detailing life on a budget? That’s awesome! But, if you’re also thinking about getting a motorcycle, remember to factor in the cost of insurance, especially if you’re planning on long rides – check out this link for motorcycle insurance with roadside assistance: Motorcycle insurance with roadside assistance.
Anyway, back to those detailing kits – I’ve found some killer deals on Amazon lately!
Optimizing the Budget DIY Detailing Experience
So you’ve assembled your budget-friendly car detailing kit and are ready to tackle that grime. Great! But getting the most bang for your buck isn’t just about the initial purchase; it’s about extending the life and effectiveness of your products and avoiding costly mistakes. This section will help you maximize your detailing experience and keep your car looking showroom-worthy without breaking the bank.Proper product care and technique are key to a successful and cost-effective DIY detailing job.
Understanding how to store and use your products correctly will not only save you money in the long run but will also ensure a superior finish on your vehicle. Let’s dive into some practical tips.
Maximizing Product Longevity and Effectiveness
Using your detailing products efficiently is crucial. Diluting products according to instructions is essential – using too much product wastes money and can leave streaks or residue. For example, many wash solutions recommend a specific ratio of concentrate to water. Sticking to these ratios is vital for optimal cleaning power and preventing excessive suds that are harder to rinse.
Similarly, using the right applicator for each product (e.g., microfiber applicator pads for waxes, foam applicators for tire dressing) enhances product application and reduces waste. Finally, always thoroughly clean your applicators after each use to prevent cross-contamination and product buildup, which can degrade their performance.
Common Mistakes to Avoid During DIY Detailing
Many common errors can lead to wasted products and unsatisfactory results. One frequent mistake is washing your car in direct sunlight. This causes the soap to dry too quickly, leaving water spots and streaks. Another common mistake is using the wrong type of wash mitt or sponge. Abrasive materials can scratch your paint, requiring more expensive repairs later.
Additionally, failing to properly rinse all soap and product residue can lead to dullness and a film on your vehicle’s surface. Finally, neglecting to properly dry your car after washing can leave water spots, negating the benefits of the entire detailing process. Always work in a shaded area and use a high-quality microfiber drying towel for best results.
Proper Storage and Maintenance of Detailing Supplies
Storing your detailing supplies correctly is vital for maintaining their quality and extending their lifespan. Keep your products in a cool, dry place away from direct sunlight and extreme temperatures. This prevents product degradation and maintains their effectiveness. For example, storing your wax in a garage that experiences extreme temperature fluctuations can cause it to thicken or separate, making it less effective.
Properly labeling and organizing your supplies will also improve efficiency. Use airtight containers to store liquids to prevent evaporation and contamination. Regularly inspect your supplies for any signs of damage or deterioration, discarding any unusable items to avoid using compromised products.
Visual Guide to Budget DIY Detailing Techniques: DIY Car Detailing Kits On A Budget

This section provides a step-by-step visual guide to cleaning and protecting your car’s various components using budget-friendly techniques. We’ll cover cleaning and protecting wheels, tires, and paint, along with proper application methods for wax or sealant and the correct use of detailing tools. Remember, careful technique is key to achieving professional-looking results even on a budget.
Wheel Cleaning and Protection
Proper wheel cleaning is crucial to maintaining their appearance and preventing brake dust buildup. Neglecting this step can lead to corrosion and damage.
- Pre-soak: Before touching your wheels with any tools, use a pressure washer or a strong hose to rinse away loose dirt and debris. This prevents scratching.
- Application: Apply a dedicated wheel cleaner using a dedicated wheel brush. These brushes usually have stiff bristles to reach into tight areas. Work in sections, ensuring thorough coverage. Avoid using the same brush you use for your car’s paint.
- Rinse: Thoroughly rinse the wheels with water, again using a pressure washer or strong hose to remove all traces of the cleaner.
- Drying: Dry the wheels with a microfiber towel. Make sure to get into all the crevices.
- Optional Protection: Consider applying a wheel sealant after cleaning to repel brake dust and make future cleaning easier. Apply this with an applicator pad and allow it to cure as directed on the product’s label.
Tire Cleaning and Dressing
Clean tires enhance the overall appearance of your vehicle. A clean tire looks better and helps protect the sidewalls from environmental damage.
- Cleaning: Use a tire brush and a dedicated tire cleaner to scrub the tires thoroughly. Pay close attention to the sidewalls and treads.
- Rinsing: Rinse the tires thoroughly with water to remove all traces of the cleaner.
- Drying: Dry the tires with a separate microfiber towel. Avoid using the same towel used for the paint.
- Dressing (Optional): Apply a tire dressing using a foam applicator or a brush to enhance the look of your tires. Avoid over-application, as it can attract dirt and leave a greasy residue. Less is more.
Paint Cleaning and Protection
Proper paint care is vital for maintaining your car’s value and appearance. This process involves washing, drying, and protecting the paint.
- Two-Bucket Wash Method: Use two buckets – one with soapy water and one with clean water for rinsing your wash mitt. This helps prevent scratching by removing dirt from the mitt.
- Wash Mitt Technique: Use a soft wash mitt and work in sections, washing from top to bottom. Use gentle, overlapping strokes. Rinse the mitt frequently in the clean water bucket.
- Drying: Dry the car with a large, absorbent microfiber drying towel. Again, work in sections, gently blotting the surface.
- Wax or Sealant Application: Apply a thin, even layer of wax or sealant using a foam applicator pad. Work in small sections, applying light pressure. Allow the product to haze before buffing it off with a clean microfiber towel.
- Buffing: Use a clean microfiber towel to buff off the excess wax or sealant. Use gentle, circular motions to achieve a smooth, even finish. Overlapping strokes help ensure complete coverage.
Proper Use of Detailing Tools
The right tools are essential for a successful detail. Using the appropriate tools can prevent scratches and make the process easier.
A high-quality wash mitt is crucial. Look for a plush microfiber mitt that’s soft enough to avoid scratching the paint. Avoid using sponges, as they can trap and spread dirt. Drying towels should also be microfiber; they’re absorbent and gentle on the paint. Applicator pads, usually made of foam, are best for applying wax or sealant evenly.
They help control the product application and prevent streaking. Finally, a detailing brush with soft bristles is helpful for cleaning tight areas like emblems and trim. Remember to use separate tools for different parts of the car (wheels, tires, paint) to avoid cross-contamination.
Last Recap
Giving your car a professional-level detail doesn’t require a professional-level price tag. By following the steps Artikeld in this guide and choosing the right budget-friendly DIY car detailing kit, you can achieve stunning results while saving money. Remember to prioritize quality products and proper techniques for optimal results. So grab your kit, get ready to get your hands dirty, and enjoy the satisfaction of a sparkling clean ride—all without emptying your wallet!